Showing posts with label Projects. Show all posts

Monday, August 27, 2012

Baby Girl's Nursery - Part 2

Only 9 days to go until our due date!!! The past 2 weeks have been full of NESTING! My extra long (and always growing) "Before Baby" To Do List has been mostly checked off! Nothing is more satisfying than a To Do list with all the boxes checked and sometimes I highlight too, just to make me feel a little more accomplished. :) Are you a TO DO list addict? Do you sometimes write things on your to do list that you've already done just so you can check it off?

Ok, moving on.....

We have decided that we will be keeping the nursery a guest room for the first month or so after baby girl is born. Since both our mom's are blessing us with a week of their help we want them to be as comfortable as possible. Which means they won't be sleeping in our unfinished, cob-web infested basement. So there will be a Part 3 post with the nursery completed.

Before
In the Part 1 post about the nursery (click here to read Part 1) I told you my next project would be to finish the 2nd dresser that my sisters and I grew up with.  I later found out from my Granny that the dresser was used by my mom, aunt, and uncle and then by my cousins too. I even found my cousin Micah's signature in the floor of the closet.  So when I was 36 weeks preggo I decided to get the dresser finished.  Thank you 100+ degree temps for making me wait to get going on it.  Here is a before and after:


After
(like all the extras stuffed in the corner?)
I know it doesn't look that different since I just painted it white again, but believe me, it looks A LOT better after sitting in the garage for 10+ years.  I painted it using the same method as I used to paint the blue dresser.  I lined the drawers and made my own fabric liner.  I love this method and will do it in the future to all my dresser drawers.  You can find the tutorial here at Blue Eyed Yonder.  I did eliminate the ironing spray, although I'm sure it would be lovely to open your drawers and the scent of lavender greet you.  Here are a few detail photos:

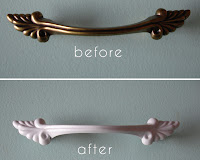
Cheap brass knobs painted the same color as the 1st dresser
and distressed.
Drawer Liner
Isn't it so cute with little clothes! Thanks Jenn Huff for the
adorable handmade dresses!
Next on my to do list was the glider.  I did not get it painted, but I did make my own fabric out of canvas drop cloth and recovered the cushions.  Again I should not have waited to do this so late in my pregnancy, but its done and that's all that matters.  I have to thank my friend Kathy for giving us the glider.  She noticed that I had pinned an idea for a glider on Pinterest way back in January and offered the glider  to us (she didn't even know we were pregnant yet)! So far this glider has only cost me about $15 which was for the dropcloth, fabric paint medium, and stencil. I already had the green paint. 

Please don't look at my horribly unorganized basement!

The paint has a little "worn" look to it.
Another friend, Janna, was cleaning out her basement and found some toys and this cute little toddler rocking chair she offered me.  I had a rocking chair when I was little and loved it, so I couldn't turn this down! I painted it the same color as the dresser and decided to distress it. I rubbed a tealight candle along the edges of the arms, legs, and back before painting.  While the paint was still wet, I used a wet wipe to remove the paint where I rubbed the wax. Then after it was dry I used sand paper to distress the rest of the chair.  I think it turned out cute and I'm going to try to use it for baby girl's monthly pictures! Thanks Janna!

Before

After

Do you know how hard it is to find fabric in a coral color?  HARD! When I saw this fabric (on the discount rack...score!) I knew it would be perfect for her room. Another easy project that took less than an hour, but adds that punch of color was sewing a changing pad cover. I used the super simple tutorial found here at Sir Bubbadoo blog.


Hopefully my next post will be pictures of my beautiful baby girl!

Tuesday, June 12, 2012

Baby Girl's Nursery - Part 1

Lots of people keep asking me how our nursery is coming.  My answer? Slowly but surely.  Its kinda hard since the future nursery is currently our guest room and our basement isn't finished to allow a space for our guests to sleep.  I want everything to be just so and with my taste (ahem, and budget) its hard to find exactly what I want in my price range.  I am also an extreme DIYer.  I find it hard to buy something when I know I can make it.  Its really a curse, because I have an on going to-do list and the bigger my belly gets the less my body lets me do. So I've become practical and know everything is not going to get done before she gets here.

I have finished one major project and that is the changing table.  I wanted to find an antique dresser and paint it.  I had this certain shape in mind and knew it would be like looking for a needle in haystack, but lo' and behold it popped up on Craigslist and we bought it for $75!  Here is a before and after.


I am soooo happy with how it turned out!  I love the color and the technique I used to paint the dresser (which took forever, but was worth it) resulted in a super smooth factory-like finish.  I had a hard time finding drawer pulls that I liked that weren't $10 a piece!  I got a little creative and found some brass knobs at Lowes, the shape was what I was looking for, so I just spray painted them and they ended up working perfectly!

So if you want to learn about the technique I used to paint the cabinet visit this online tutorial How to Paint Furniture by Centsational Girl.  The only thing I did different was I used a foam roller for the drawer fronts, sides and top of the dresser instead of a brush.  Here is another tip! Our drawers were sticking really bad after we finished painting and we purposely did not paint the wood runners along the side.  My dad said to use beeswax for them to slide better.  So I thought, "Ok, where am I going to find beeswax!" I stopped by a honey booth at the local farmer's market and sure enough they had a small bar of beeswax for $0.75 and it worked like a dream!

Joel Dewberry - Herringbone in Pond
I've selected the fabrics for the baby bedding, which my wonderful Mother-in-law is sewing for me. Here is one of the fabrics that I fell in love with! I'm also using some greens and corals in the room!  Can't wait to see it all come together!

Next on my list......
1.  Sand/Paint Child's Armoire
2.  Sand/Paint Glider
3.  Make fabric for Glider Cushions out of drop cloth
4.  Recover Glider Cushions


Here is a picture of my next project which my parents refinished for my room when I was little.


To be continued...........................

Friday, May 25, 2012

ReRoofing the House

So life has been crazy busy, but a good crazy busy! We have been traveling, working on house projects, gardening, and working on the nursery.

In April we decided to replace our roof. Our Sunday School class at church volunteered to help us. They are not new to this kind of service project since they have replaced several family's roofs in our class.  I cannot tell you what a blessing and testimony this was. Financially is was a huge savings, but more than that, seeing a group of 12 men sacrifice time away from their families and their weekend seriously touched our hearts. They started Friday night around 5pm and were able to tear off the old shingles and put new shingles on the entire back of the house by 7:30pm.  Saturday morning they started around 8am and got the rest of the roof done by 11:30, literally 10 minutes before the monsoon hit!  We had about 4-5 neighbors comment to us that they couldn't believe how fast these guys worked.  What an incredible testimony of how the Body of Christ serves each other! Not only did the men help with the roof, but their wives also sent food to help with Friday's dinner and Saturday's lunch, which I very much appreciated! Here are some pictures of the project.


Brother's in Christ at work

They are working on the front of the house, but I had to take pictures, just in case we got hail that afternoon.

As each one has received a special gift, employ it in serving one another as good stewards of the manifold grace of God. 
I Peter 4:10

Sunday, September 18, 2011

Fall Garden Prep/Raised Cedar Garden Bed

Now that we live in Nebraska the weather is a little more permitting for a garden. Well, you can have a garden in Oklahoma, whether it lives or not is the question. We have wanted to build a raised garden bed for a while and found a cheap and easy pattern from www.Ana-White.com.  Here is the link to the project plan. (http://ana-white.com/2010/05/hack-natural-rustic-cedar-raised-beds.html)

In a short Sunday afternoon we (well mostly the hubs) built one 18" x 72" raised cedar garden bed.  The great thing about this project is it cost about $12!  We used (6) 1"x6"x6'.  I won't bore you with the details because if you really want to make this you can find the instructions at the above link.


 Who can resist a man with power tools?


The finished Product! Pretty cool, huh?

 Just had to show our little helper. We cracked the garage door for a little breeze, and Ruger just had to see what was going on outside.