Ok, moving on.....
We have decided that we will be keeping the nursery a guest room for the first month or so after baby girl is born. Since both our mom's are blessing us with a week of their help we want them to be as comfortable as possible. Which means they won't be sleeping in our unfinished, cob-web infested basement. So there will be a Part 3 post with the nursery completed.
 |
| Before |
 |
| After (like all the extras stuffed in the corner?) |
 |
| Cheap brass knobs painted the same color as the 1st dresser and distressed. |
 |
| Drawer Liner |
Next on my to do list was the glider. I did not get it painted, but I did make my own fabric out of canvas drop cloth and recovered the cushions. Again I should not have waited to do this so late in my pregnancy, but its done and that's all that matters. I have to thank my friend Kathy for giving us the glider. She noticed that I had pinned an idea for a glider on Pinterest way back in January and offered the glider to us (she didn't even know we were pregnant yet)! So far this glider has only cost me about $15 which was for the dropcloth, fabric paint medium, and stencil. I already had the green paint.
 |
| Please don't look at my horribly unorganized basement! |
 |
| The paint has a little "worn" look to it. |
Another friend, Janna, was cleaning out her basement and found some toys and this cute little toddler rocking chair she offered me. I had a rocking chair when I was little and loved it, so I couldn't turn this down! I painted it the same color as the dresser and decided to distress it. I rubbed a tealight candle along the edges of the arms, legs, and back before painting. While the paint was still wet, I used a wet wipe to remove the paint where I rubbed the wax. Then after it was dry I used sand paper to distress the rest of the chair. I think it turned out cute and I'm going to try to use it for baby girl's monthly pictures! Thanks Janna!
 |
| Before |
 |
| After |
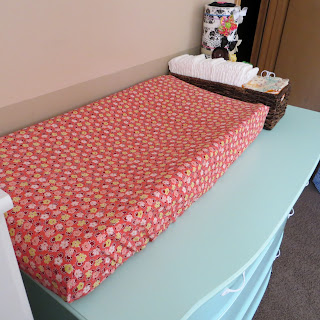
Do you know how hard it is to find fabric in a coral color? HARD! When I saw this fabric (on the discount rack...score!) I knew it would be perfect for her room. Another easy project that took less than an hour, but adds that punch of color was sewing a changing pad cover. I used the super simple tutorial found here at Sir Bubbadoo blog.
Hopefully my next post will be pictures of my beautiful baby girl!

